 |
Using the Color-by-Example filter with Layer
Mask by Sally Litowsky |
|
I would like to talk about using Layer Mask along with Color-by-Example. As a matter of fact, this technique works with any Photoshop filter. Layer mask is used whenever a filter needs to be applied to some parts of the image leaving other parts intact. The Fuzziness parameter of Color-by-Example allows me to control the extent of color changes. When Fuzziness is low, only the selected colors and ones very similar to them are changed. When Fuzziness is high, more colors are changed. The degree to which a particular color changes is determined by how similar it is to the selected colors. Unfortunately, a specific setting of Fuzziness can be good for one part of the image, but not so good for other parts containing the same colors. There are three different approaches to solving this problem: |
|||||||
|
|||||||
| I will focus on the approach C, the use of Layer Mask. It requires a couple of additional steps, but the results justify the extra effort. | |||||||
|
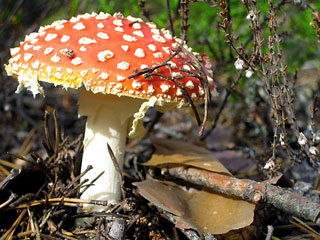
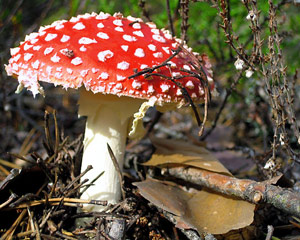
Last year I took this picture of a mushroom. I liked it, but I wished the mushroom head looked a little brighter. |
 |
| I had a similar image where the mushroom was just the color I wanted: | 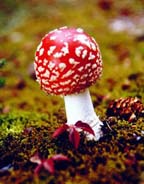 |
|
I decided to use Color-by-Example to adjust my new image by copying the red color from the old picture and using the Layer Mask. To do so, I performed the following steps: |
|
| 1. | I opened my new image in Photoshop (Photoshop Elements would do just as well.) | ||||||||||||||
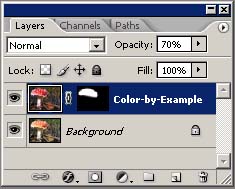
| 2. | In the Layers palette I right-clicked on the image layer and selected "Duplicate Layer". This created a copy of my image in a new layer. I will use Color-by-Example to adjust colors in the new layer and mask out the parts of the image that don't need to change. | ||||||||||||||
| 3. |
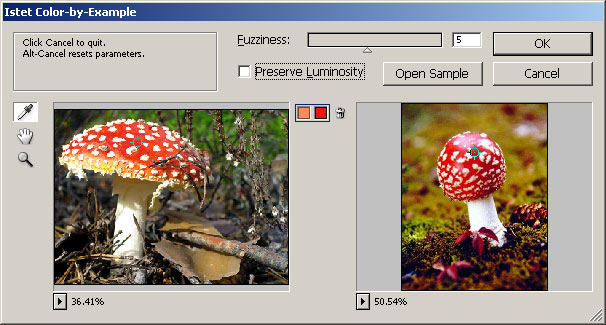
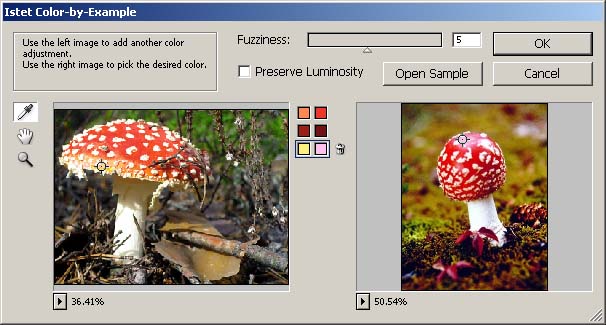
I selected Istet/Color-by-Example from the top Filter menu and opened the sample image. It also remembered the color adjustments I made the last time I ran Color-by-Example. The Color-by-Example window looked exactly as I left it before. |
||||||||||||||
 |
|||||||||||||||
| By the way, if you need to get rid of those old adjustments, hold the Alt key - the Cancel button becomes Reset - then click on the Reset button. | |||||||||||||||
| 4. | Now I wanted to change some other colors as well. I wanted the darker orange to become dark red and yellow to become pink. I selected a point in the right part of my left mushroom and matched it with a point in the lower right part of the sample mushroom. Another selection matched the yellow on the left to the pink on top of the right mushroom: | ||||||||||||||
 |
|||||||||||||||
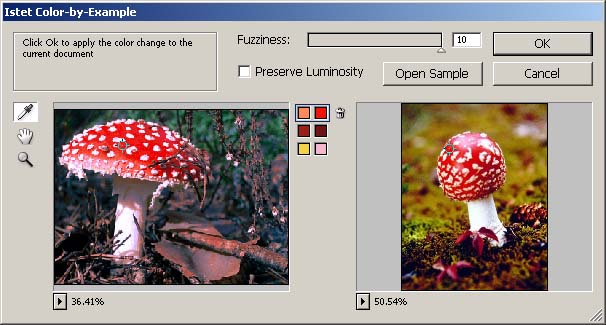
| 7. | Next I adjusted the Fuzziness parameter. I wanted all orange colors and most yellows to be changed, so I moved the Fuzziness slider all the way to the right. | ||||||||||||||
 |
|||||||||||||||
| 8. |
Now the head of the mushroom was just right, but the high setting of Fuzziness also made a lot of other colors change. Remember, at the very beginning of the process I created a Layer for the color adjustment. Now was the time to use it. First of all, I clicked Ok to apply color adjustments to my image.
|
||||||||||||||
| The result was just as I wanted: the mushroom had a bright red color while the remainder of the picture stayed intact. | |||||||||||||||
| I use Color-by-Example a lot in my day-to-day work. It combines flexibility with ease of use. It allows me to utilize my own experience and creativity, and takes care of technical details. | |||||||||||||||
| Before | After |
|
 |